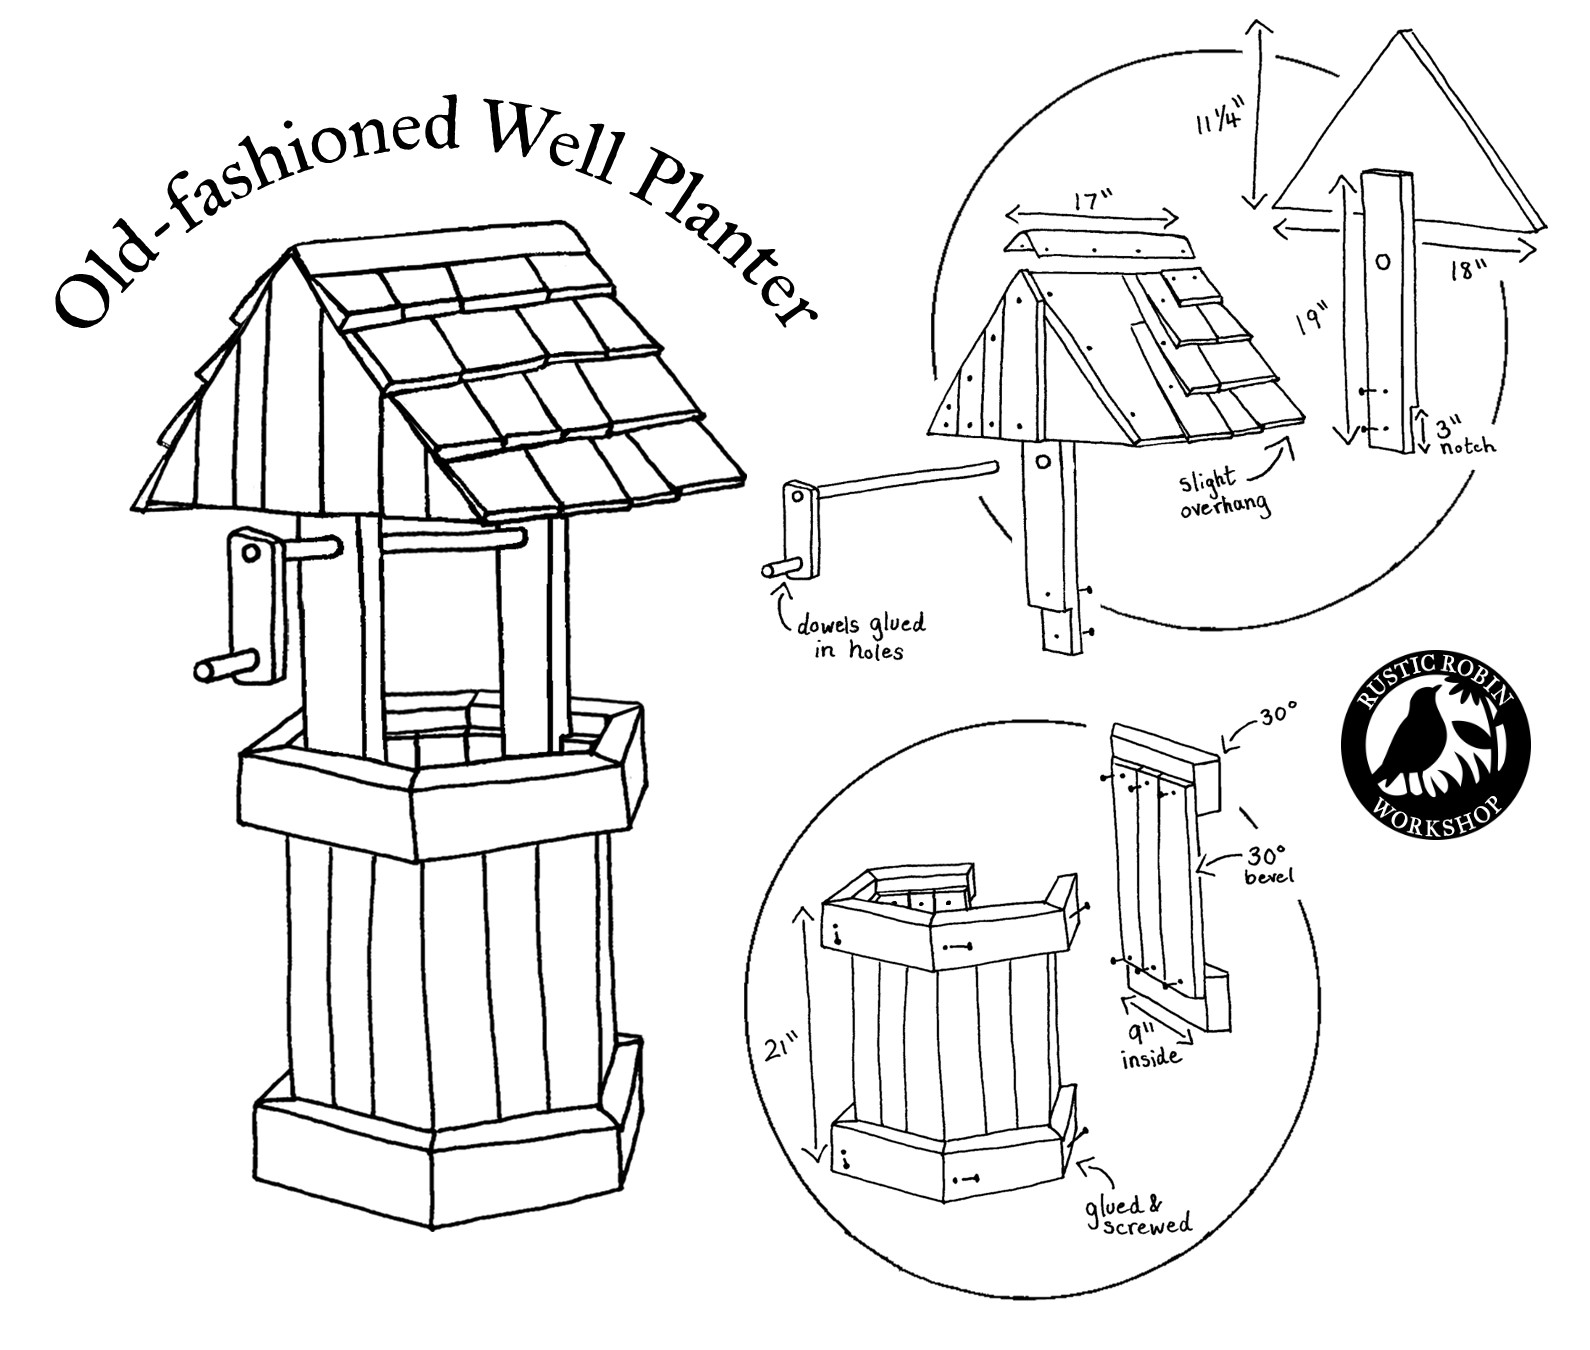
Old-fashioned Well Planter
This old-fashioned well planter is made mostly of pallet wood and is quite simple to make.
An old-fashioned well planter is the perfect decoration to cover unsightly utilities in your lawn. You can make it as big or as small as you need. I made mine to fit over an ugly wellhead in the middle of my flower garden.

|
|
THE BASE:
I chose some good 3 1/2" planks (a.k.a. deck boards) from the pallets
and cut them to the height I wanted. The planks that were not in the
best shape could still be used for the smaller and thinner pieces. Using
the table saw I cut a 30° bevel on one long edge of each of the
larger 3 1/2" planks.
The frame for the hexagonal base is made of 2x4s, some were from pallets, some were cut-offs from other projects. The ends are cut at a 30° angle on the miter saw.
I assembled all six panels beforehand so I could nail the planks on the inside. Nailing the pallet planks on the inside keeps the outside face flush even if the pallet pieces are not all the same depth. I used nails taken out of pallets and others I got for free. You are probably wondering why I cut the pallet planks shorter than the actual height of the base. This is to save on pallet wood and it allowed me to use planks that otherwise wouldn't have been usable.
The panels are then glued and screwed together for a nice strong base.
THE ROOF:
I cut the two roof supports out of a 2x4 pallet stringer. The ends are
notched to sit over top of the pallet planks on the inside of the base then
screwed in place. I started the roof with gable ends cut from scrap 1x12
and used whatever 3/4" scrap I had as the sheathing.
More pallet planks were used to give the gable ends a matching rustic look and then the roofing was installed. The roofing I used is old cedar starter shingles and a piece of copper flashing that came off my house during renovations.
THE REEL:
All there is to do now is add the reel assembly. The dowel came off of an old DVD rack and the bucket and rope were free on the side of the road. I drilled holes slightly larger than the diameter of the dowel and slid the dowel into place. I chose to fasten my reel in place so it doesn't move, but you can do whatever you want! You can also omit the rope and bucket and place a pot inside the well base or just leave it as is with no flowers. It's up to you!


Nicely done! Thanks for sharing this project.
ReplyDeleteThank you!
DeleteLooks great. Thanks for the detailed pallet project
ReplyDeleteThanks! Hope this helps you build your own.
Delete